How to Create a Finder Action to Open a Folder in VS Code
Credit:
This is completely a copy off of Michal Tynior's tutorial, "How to add Open in VS Code option to Finder"!
Thank you so much for the perfect tutorial. I am writing it here just for my own note taking.
1. Open Automator
- Open from terminal:
~/Applications/Automator.app
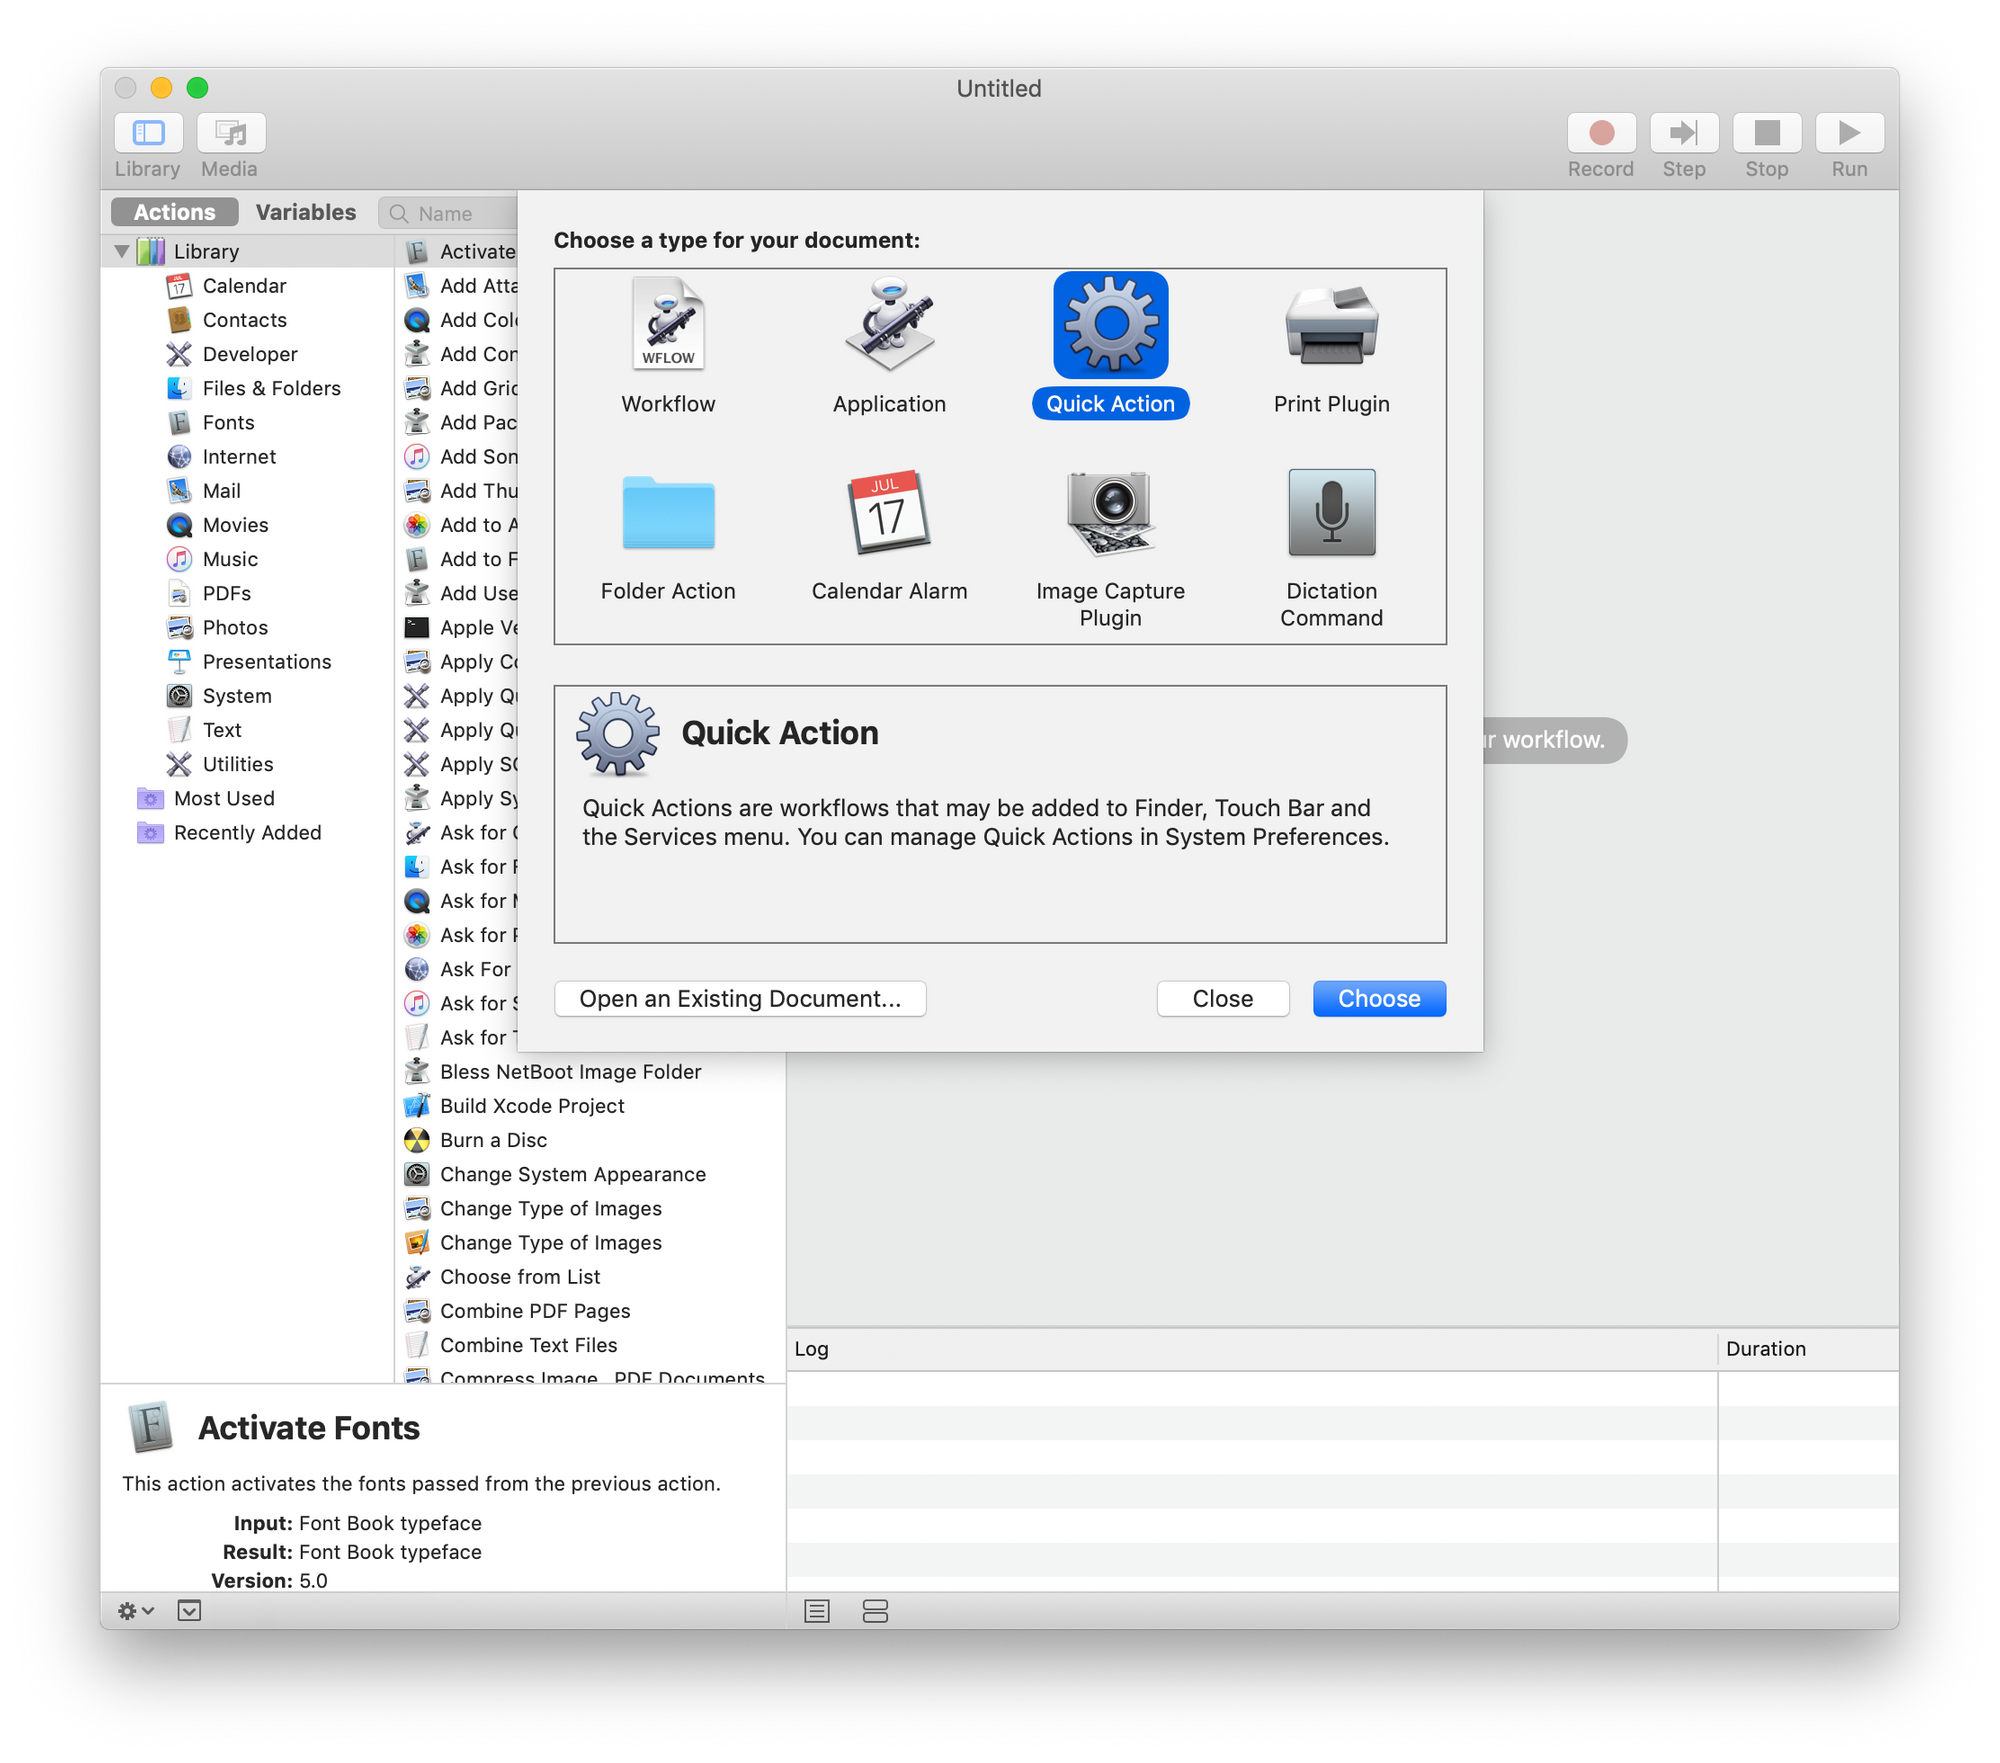
2. Select Quick Action template
- Select
Create New Document - Select
Quick Actiontype.
3. Get Selected Files/Folders from Finder
- We need to get the selected files or folders to pass onto VS Code
- Select
Files & Foldersgroup from the library - Select
Get Specified Finder ItemsAction - Drag-&-drop the Action to the workflow area
4. Open the Selected Items in VSCode
- The last step is to open those files in the VSCode.
- Select
Files & Foldersgroup from the library - Select
Open Finder ItemsAction - Drag-&-drop the Action to the workflow area, below the "Get Specified Finder Items" Action
- In the "Open Finder Items" Action, there is open with option. Just select the VSCode.
5. Save the Action
- Save the Action as
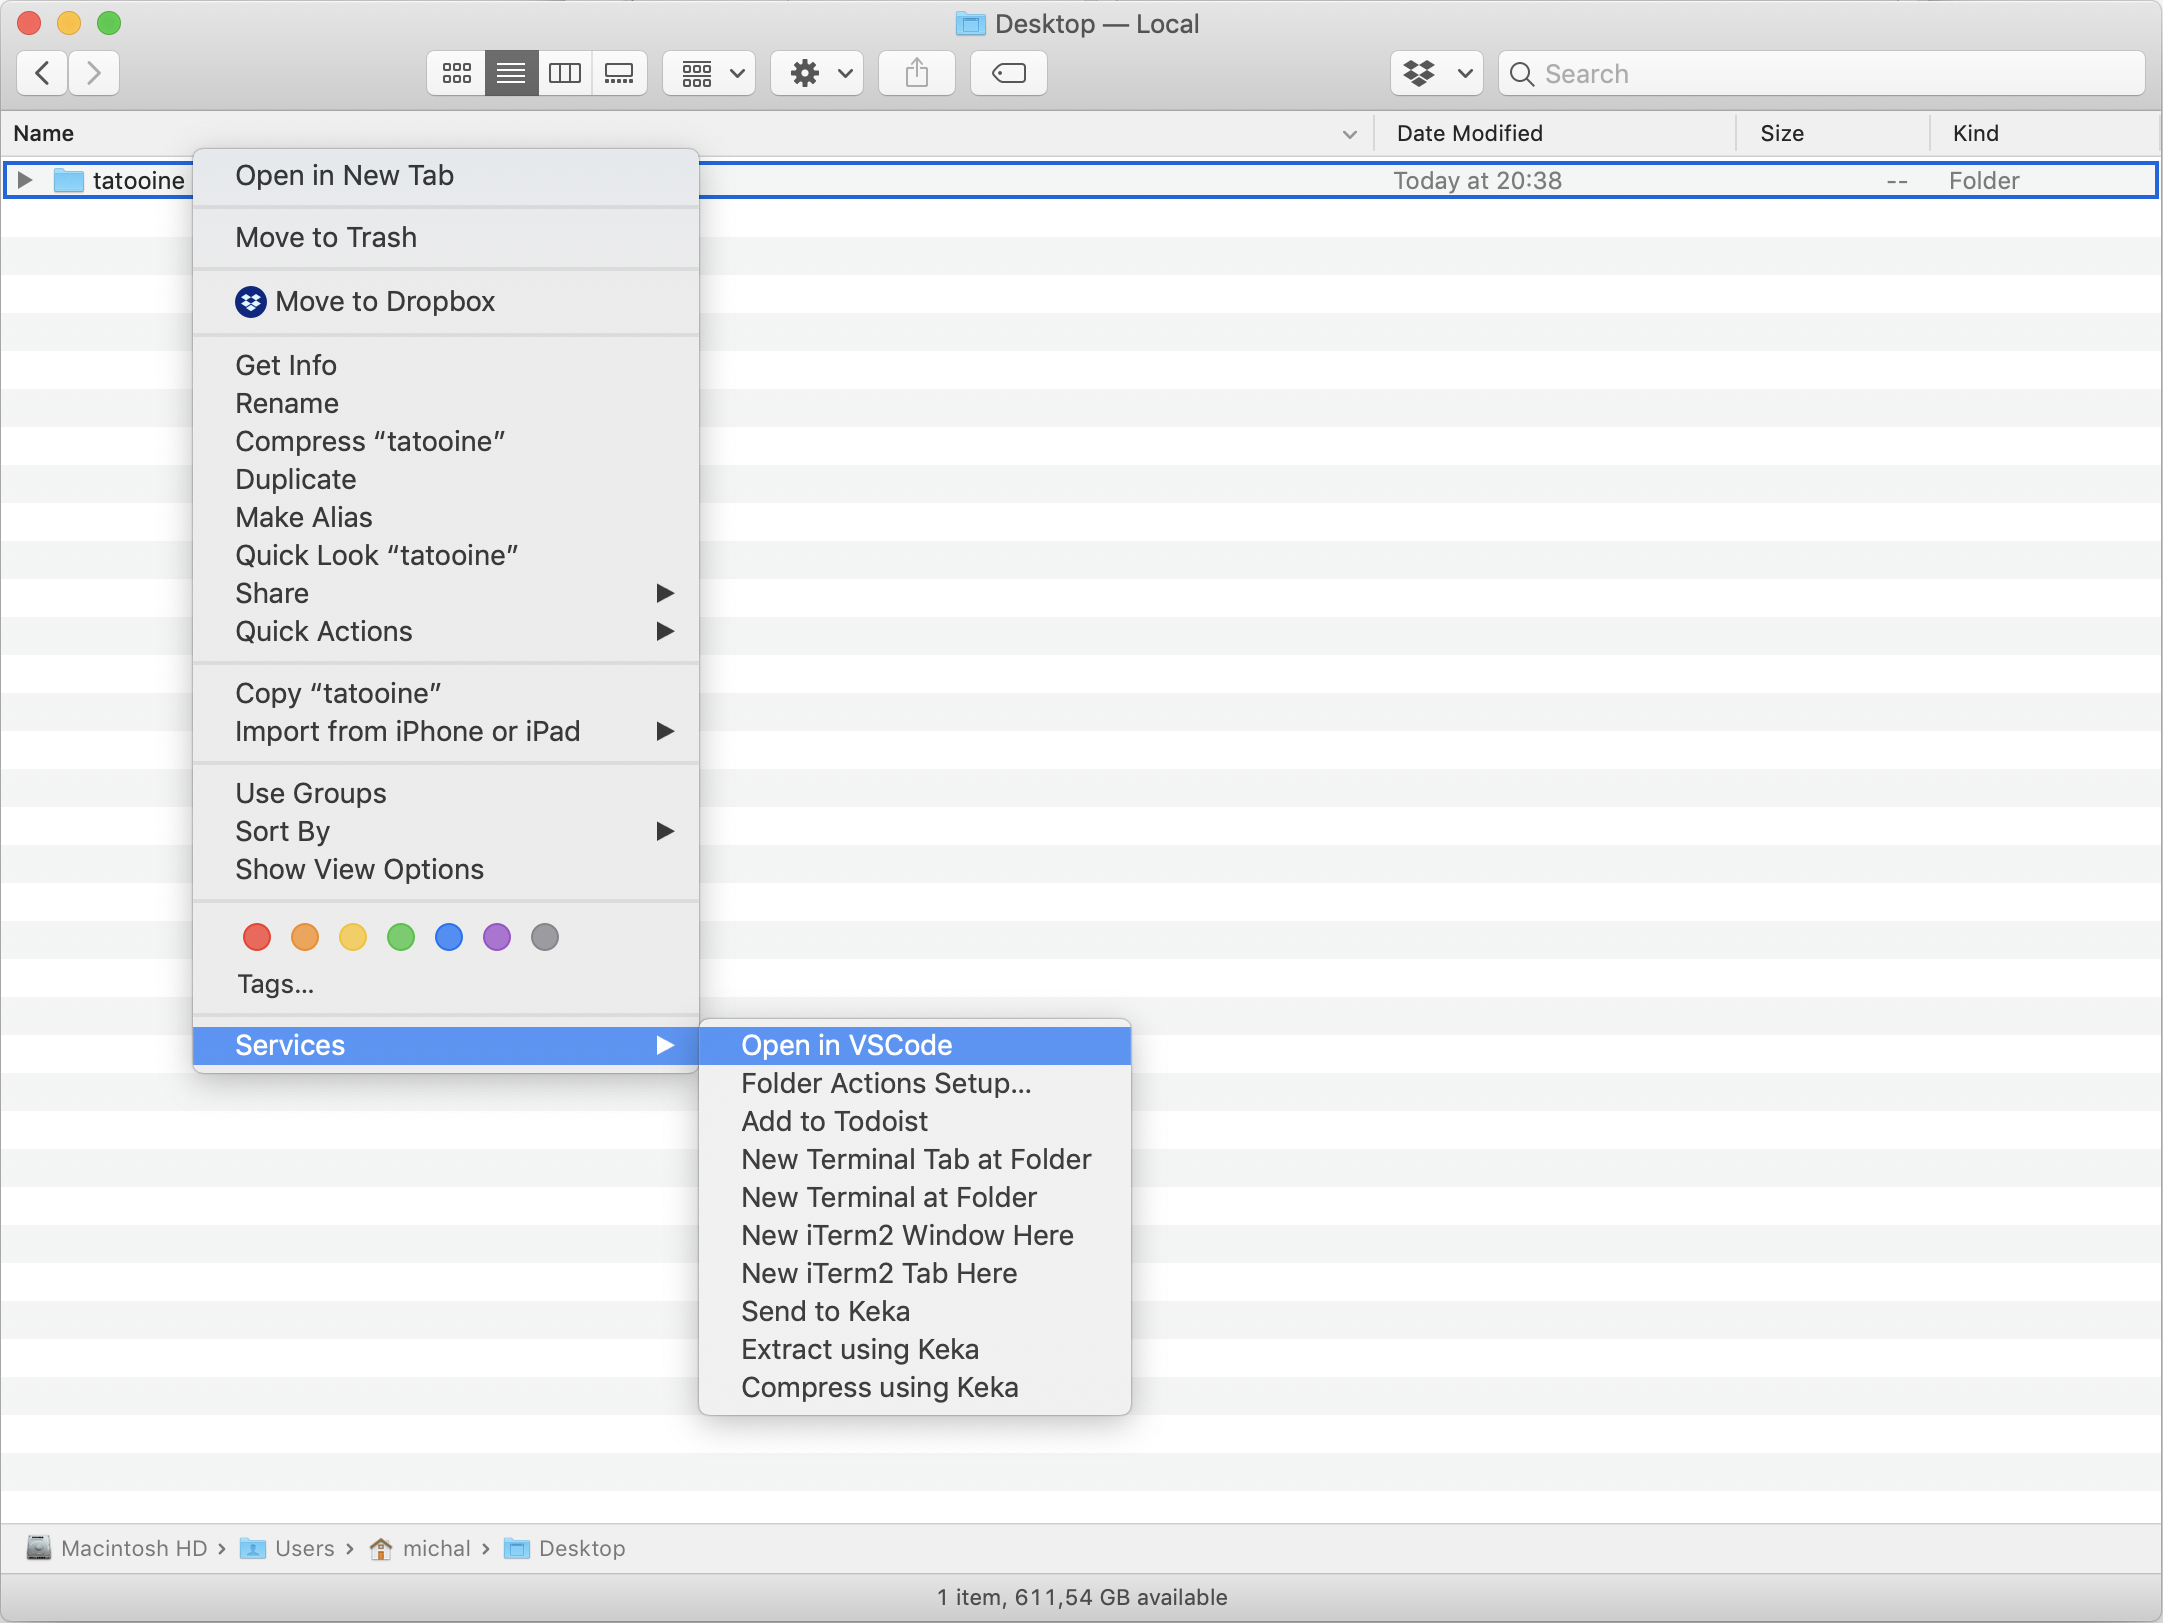
Open in VSCode - This Action will be displayed from Finder with a Right-Click, under
Services
Screenshots
| Step 1 | Step 2 | Step 3 | Step 4 |
|---|---|---|---|
 |  |  |  |
Demo Gif